- Quote Management # {#quote-management}
Quote Management
In this chapter, we will discuss how to change fields information, move quotes to another status, generate documents, create transactions, manage activities, check API logs and changelog.
Quote Actions
A quote can be edited, duplicated, or removed. To perform these actions, hover over the three dots on the right of the field and select Edit, Duplicate, or Remove.

Duplicate Quote
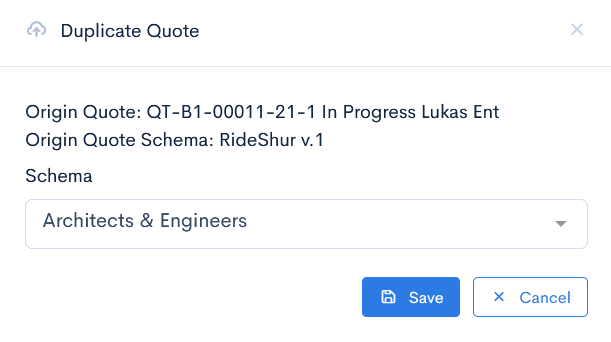
Sometimes similar insurance products need to be managed using different schemas. In this case you can use the duplicate function, which creates a copy of already entered quote from one schema to another. Click Duplicate, and in the Duplicate Quote window select the required schema and click Save. A new exactly the same quote will appear in the list.
{info.fa-info-circle} The existing information will be copied only to the identical name fields.
Remove Quote
The quote will be deleted if Remove is clicked.
{info.fa-info-circle} The issued quote, or quote with linked objects, documents, transactions, or activities cannot be deleted.
If the quote is in one of the following states: issued, terminated, outdated, then there is a possibility to delete the current version of the schema. To do so, go to the quote, hover over the three dots on the top right and click the Cancel Quote Version button.
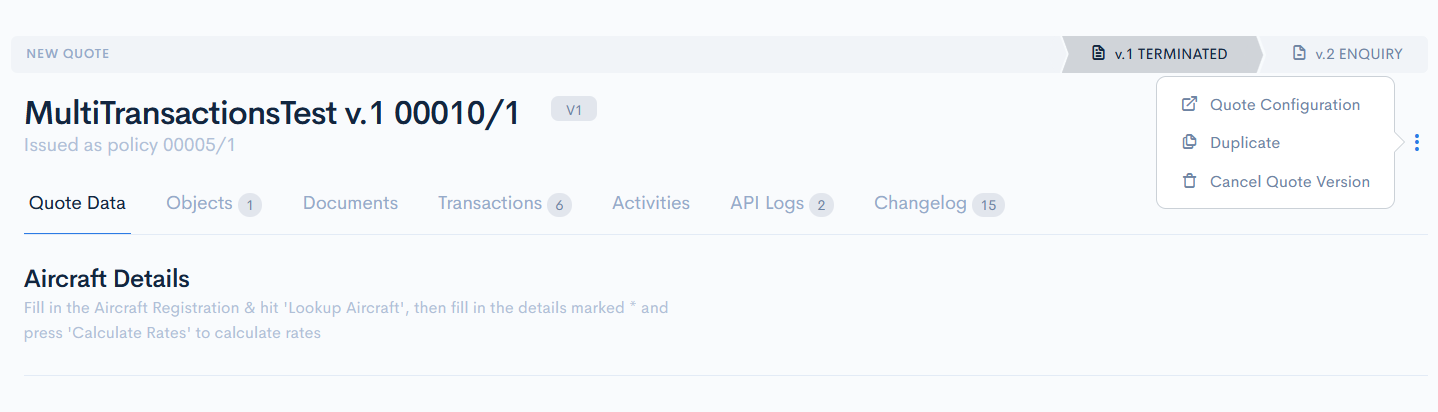
{info.fa-info-circle} The next quote version (which might be created after delete) will get the deleted quotes' version.
Edit Quote
Click the Edit button or name of the quote to manage details.
{info.fa-info-circle} Fields of the issued quotes cannot be edited.
Objects
In the Objects section, you can add an object, that needs to be covered by insurance. For more information on how to create an object, see Create Group The objects list has the following columns:
| #V | Quote version, to which the object is assigned. |
| Group | Object group. There can be several groups (such as vehicles, computers, etc.), from which you must select. |
| Category | Category, that is related to the selected group. |
| Number | Object number, assigned by you. Note: You can sort the list by number in ascending or descending order, if you click on Number. |
| Cover Begin | Start date of coverage. Note: You can sort the list by start date in ascending or descending order, if you click on Cover Begin. |
| Cover End | End date of coverage. Note: You can sort the list by end date in ascending or descending order, if you click on Cover End. |
| Creator | System user, who added this object. |
| Props | Object properties. To see them, hover over More. |
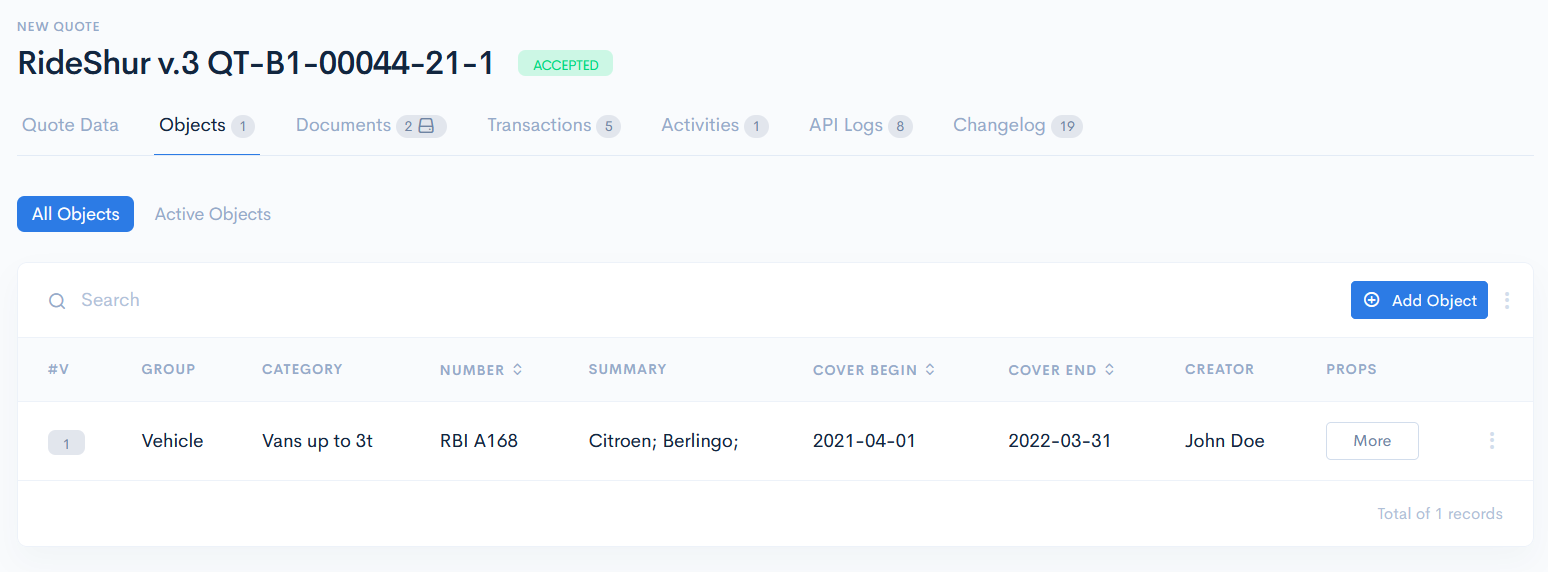
Add Object
To create a new object, click the Add Object button.
In the Create Object window enter the required information and click Save. Now the new object will appear in the list.
Example of an object form:
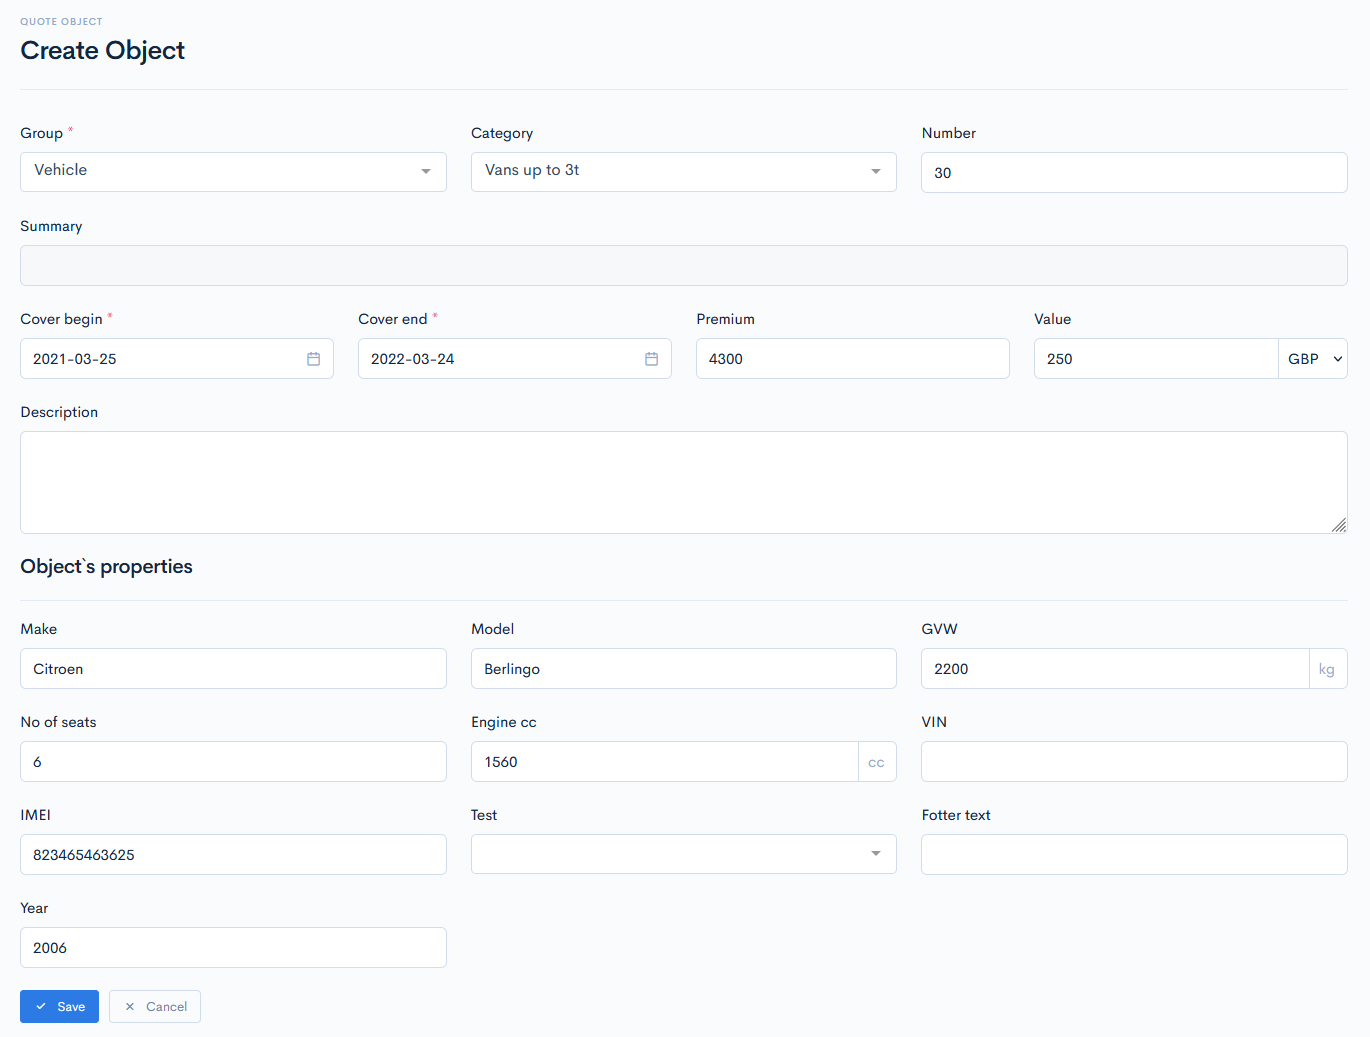
{info.fa-info-circle} Fields marked with a red asterisk (*) are mandatory.
Another way of creating an object is to import it. Hover over the three dots next to the Add Object button and click Import Objects.

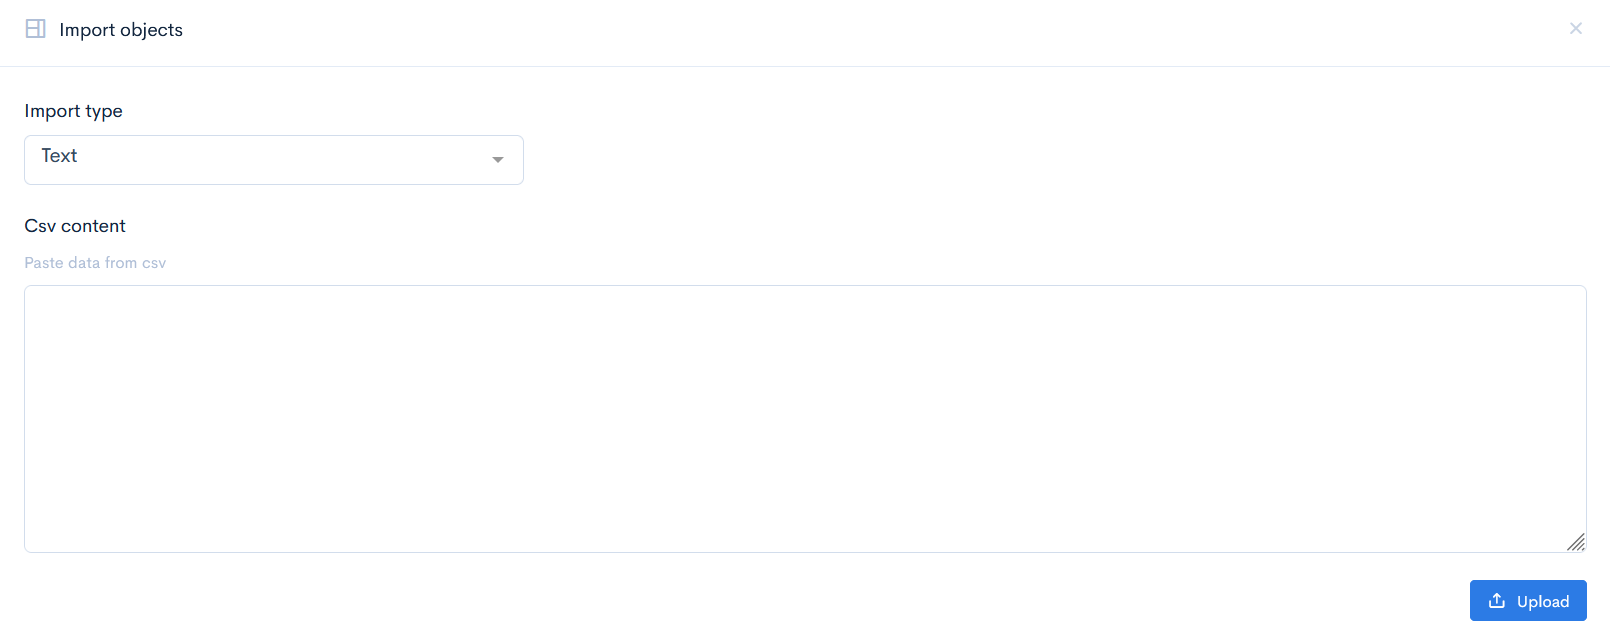
In the new window select the Import type: File or Text.
If you selected File, then it is required to upload a .xslx type of file. Click Upload.
{info.fa-info-circle} The file column names must be exactly the same as object form field names.
Example of a .xslx type of file:

If you selected Text, then paste the content from the .csv type of file into the Csv content field. Click Upload.
Export Object
The existing list can be exported as an .xslx file. Hover over the three dots next to the Add Object button and click Export XLSX. Save the file where you need it.
Documents
In this section, you can see upload/download various documents (such as schedules, certificates, statements, invoices, reports, quotations, etc) related to the quote. For more information on documents, see Documents.
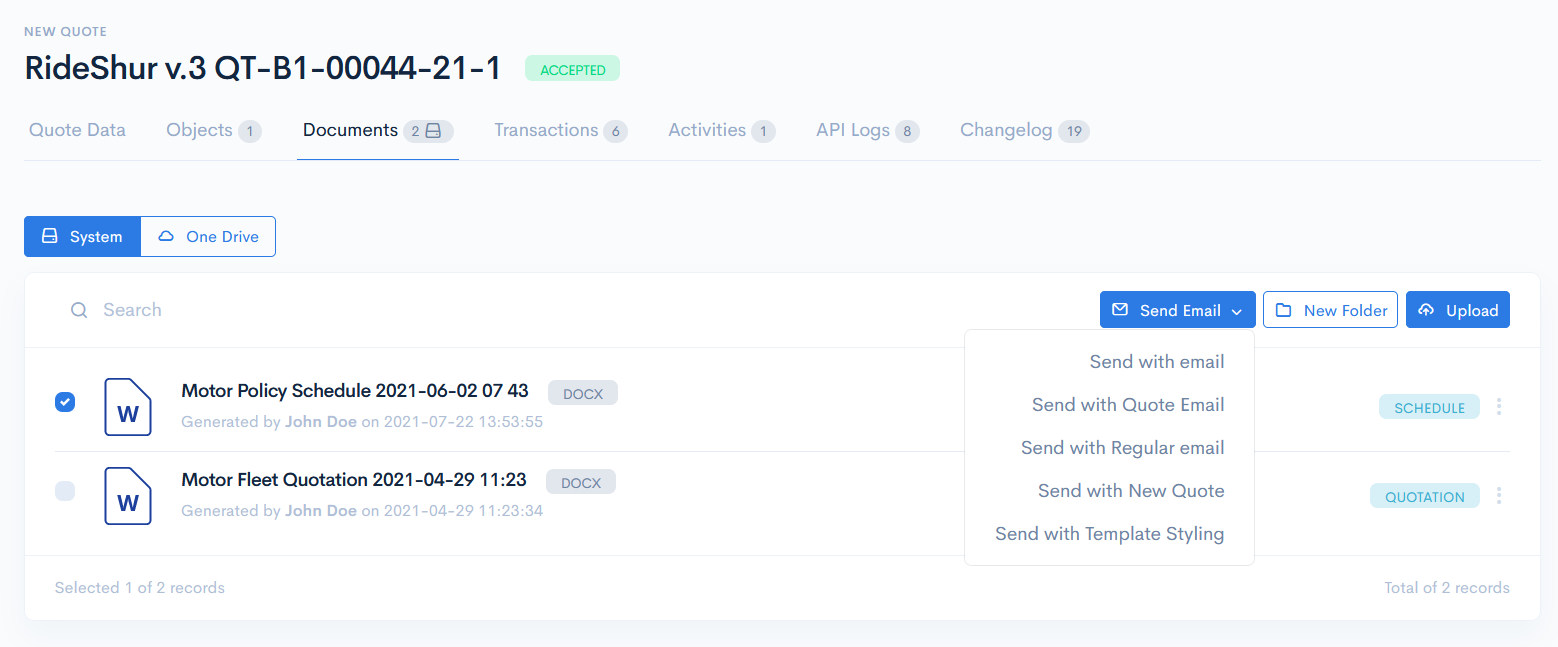
In addition to the information mentioned in the link, here you can create an email and a checked document will be automatically attached to it.
Tick the desired document, click the Send Email button, and selected one of the email templates. For more information on templates, see Email Templates.
In the new Send email window edit the required details, and click Send.
{info.fa-info-circle} If you send an email without template, the system email will be used in the From field.
Transactions
The Transactions section is used for the creation of receivables and payments.
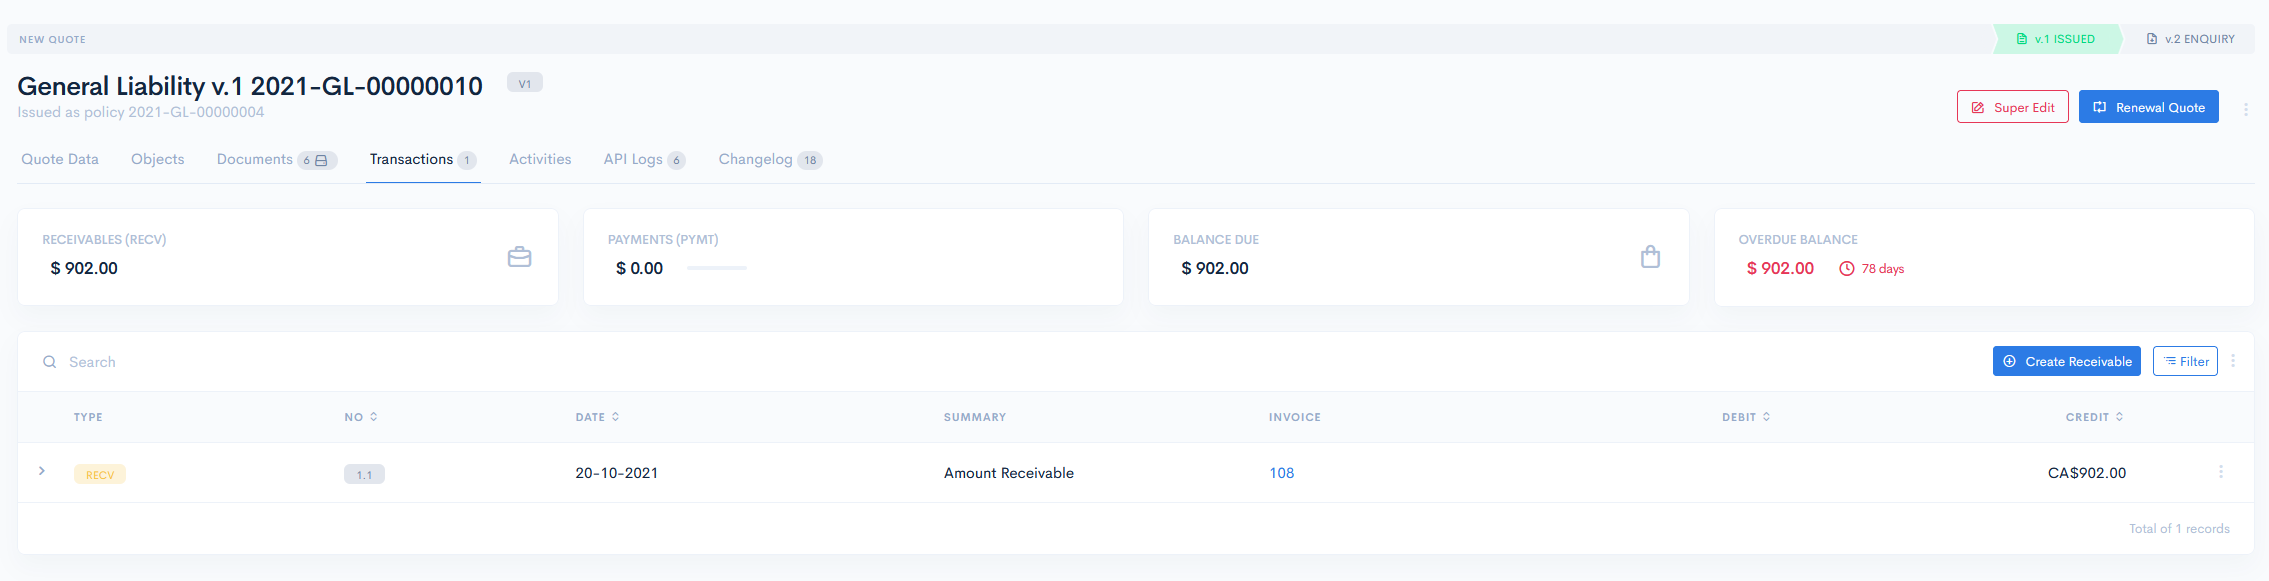
If there are already some transactions created, you will see the quote transactions summary block with the Receivables, Payments, Balance Due and Balance Overdue sections. This block shows you the overall sum of the receivables with payments, also calculates the balance and shows for how many days the particular amount payment is late.
The transaction list has the following columns:
| Type | Type of the transaction. Possible values:
|
| No | Index number of payment, which is assigned by you. Note: You can sort the list by number in ascending or descending order, if you click on No. |
| Date | Due date of payment. Note: You can sort the list by date in ascending or descending order, if you click on Date. |
| Summary | Breaks down of what the receivables consist and defines how the payments were made. There is always a parent transaction and its child transactions. If the receivable consists only of one child, then it will define the whole sum of the parent transaction. |
| Invoice | Indicates invoice, which is created for the particular amount receivable. For more information, see the Add Invoice chapter. |
| Credit | Amount of money to be received. Note: You can sort the list by credit in ascending or descending order, if you click on Credit. |
| Debit | Received amount of money. Note: You can sort the list by debit in ascending or descending order, if you click on Debit. |
{info.fa-info-circle} You can filter out the list by type, index, currency, and date. To do this, click on the Filter button.
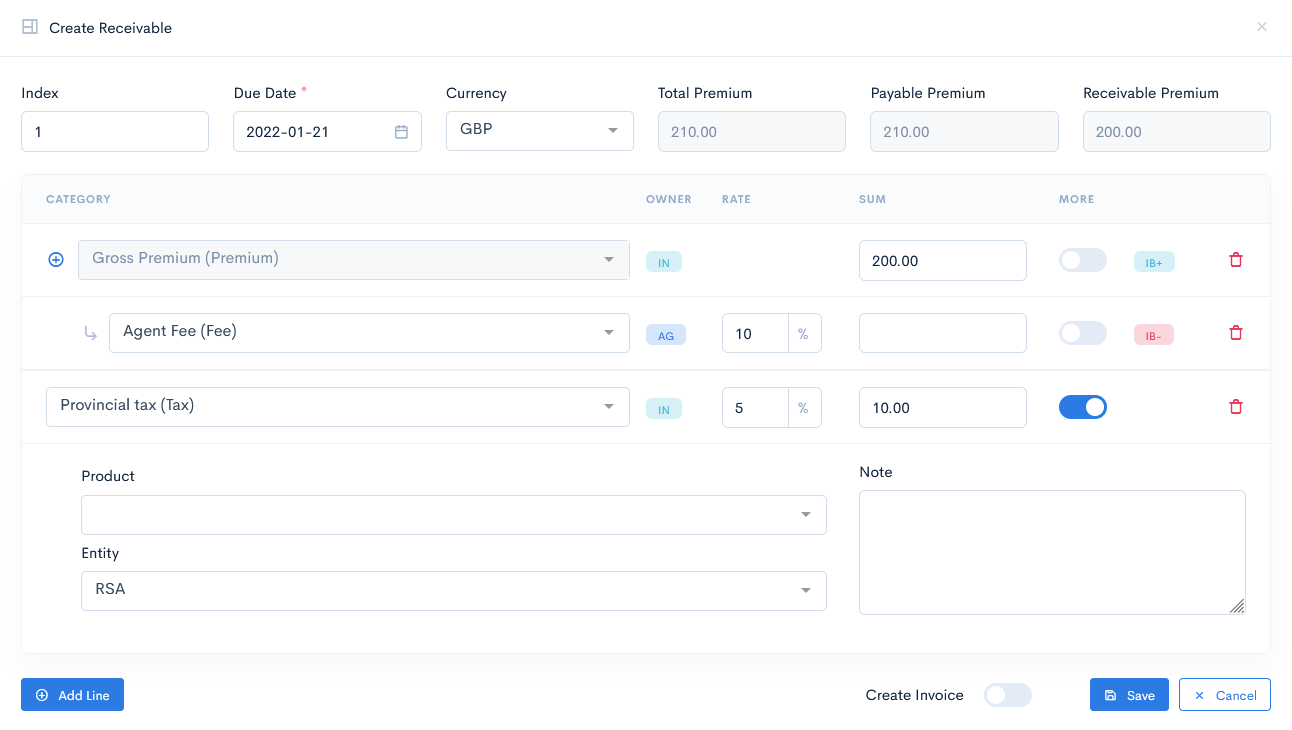
Add Receivable
To add a new receivable, click on the Create Receivable button, and in the new window enter the required info. To define what the receivable consists of, add as many lines (child transactions), as you need and select Category, enter Rate and Sum. If you need, select product or entity and add a note on the line by toggling the More button. Later this note will be transferred to the invoice.
Every Premium category has the possibility to add a dependant transaction. This is used when we have separate insurers on one transaction and we need to attribute the correct commision per correct premium line. Click the icon and the dependant transaction row will appear.
The total sum of child transactions will be the final parent transaction value. If the child transaction is in total balance positive (IB+), then the amount will be added. If the child transaction is in total balance negative (IB-), the amount will be substracted.
Click Save. Now the new receivable will appear in the list.
{info.fa-info-circle} If you toggle the Create Invoice button, then the invoice will be automatically created after saving the receivable.
{info.fa-info-circle} By default, the index first number is 1. To increment the index, type in the whole number, e.g. 2, 3, 4, etc. The system will automatically convert the index to 1.2, 1.3, 1.4, etc.
{success} If you need to use the invoice in a diferrent currency, you can select the Settlement Currency, which will convert the calculated amount of money.
{info.fa-info-circle} Depending on the category, the receivable owner type might change.
Add Invoice
Additionally, you can add an invoice to the receivable. Hover over the three dots on the right of the receivable and click Add Invoice.
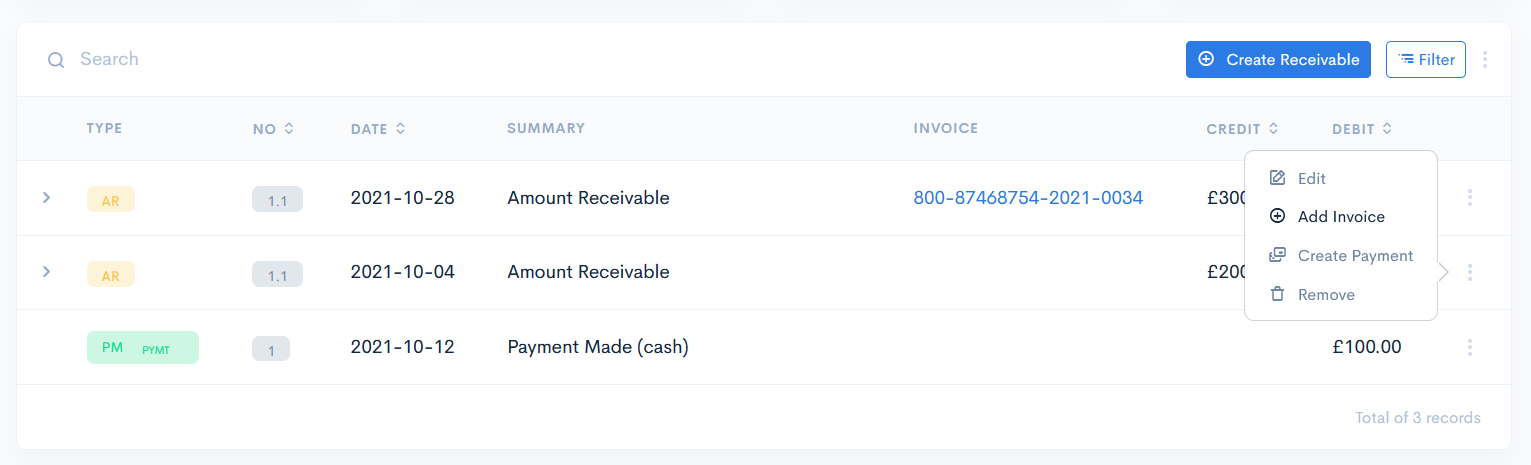
In the new Create Invoice window enter the required info and click Save. This invoice will appear in its receivable. Every new invoice number increments.
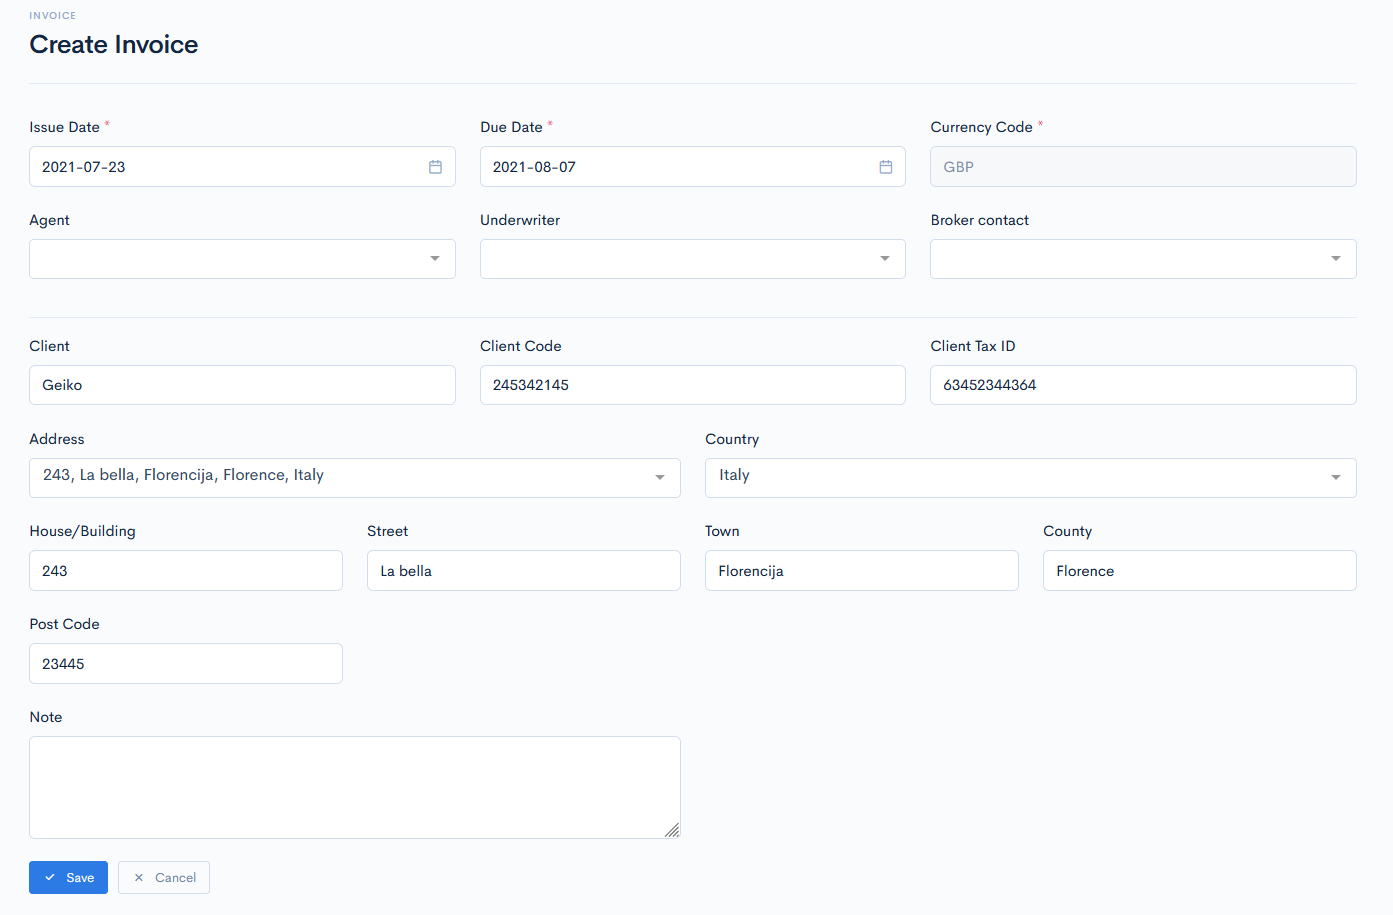
{info.fa-info-circle} After you created an invoice, it is not possible to edit or remove the receivable anymore. You can only generate a .pdf file for the invoice or add a payment. Hover over the three dots and click Generate PDF or Create Payment.
{success} If you have a lot of receivables with child transactions, there is a possibility to expand everything at once. Hover over the three dots in the trasactions section and click Expand All Rows.

Add Payment
When you receive a payment from a client, it should be registered to the receivable. For this the Q&B system has a payment form.
To add a new payment, hover over the three dots of the receivable row and click the Create Payment button. In the new window enter the required info and click Save. Now the payment will appear in the list.
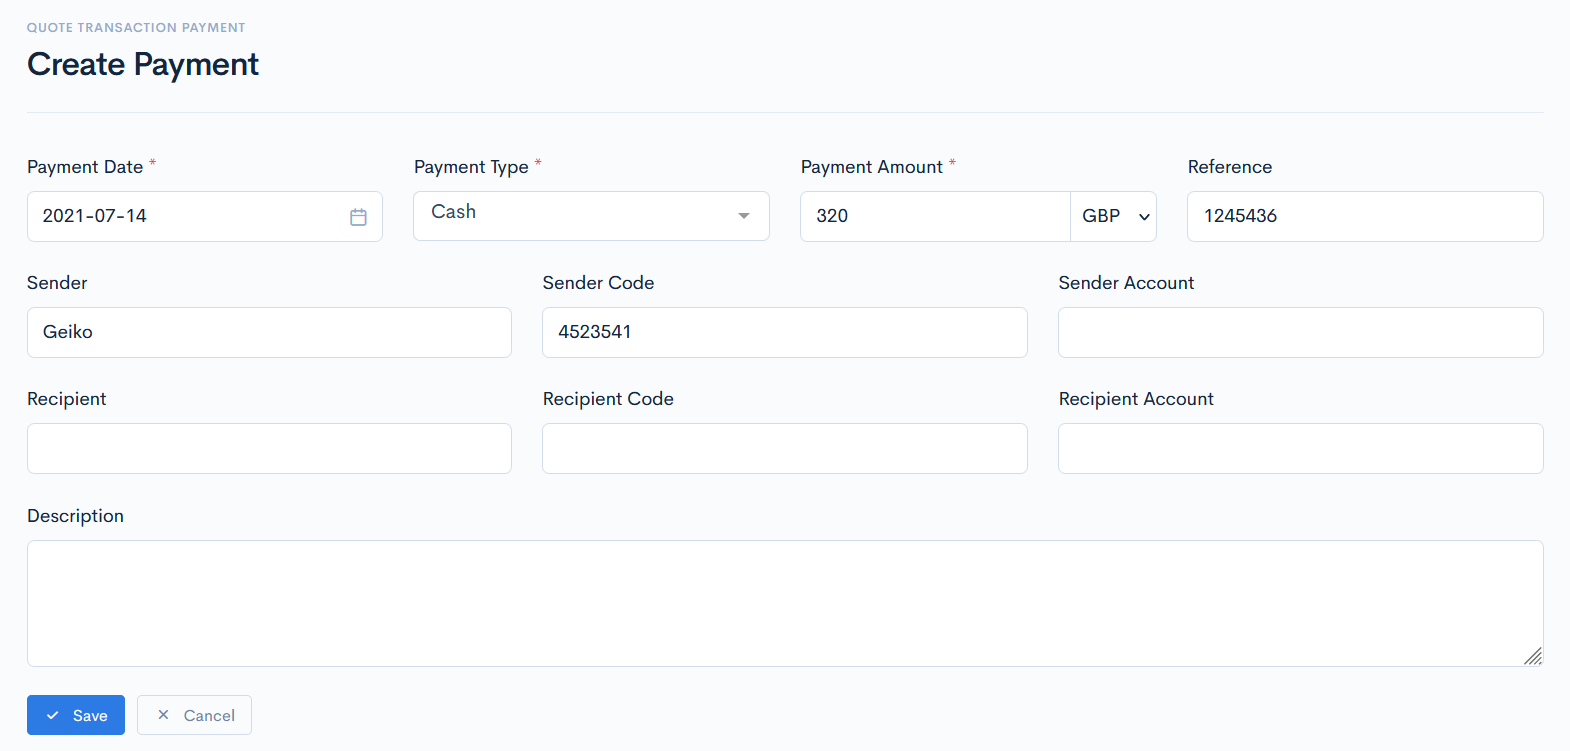
{info.fa-info-circle} Fields marked with a red asterisk (*) are mandatory.
Edit or Delete Payment
To edit or delete the payment, hover over the three dots on the right of the payment and click Edit Payment, or Remove.

Activities
In the Activities section, you can schedule some reminders for sending emails, making tasks, notes, calls, or meetings, which are related to the quote.
For more information on how to create a new activity, see the Activities chapter.
{info.fa-info-circle} If the activity was created in a particular quote, that quote number will appear in the diary of activities.

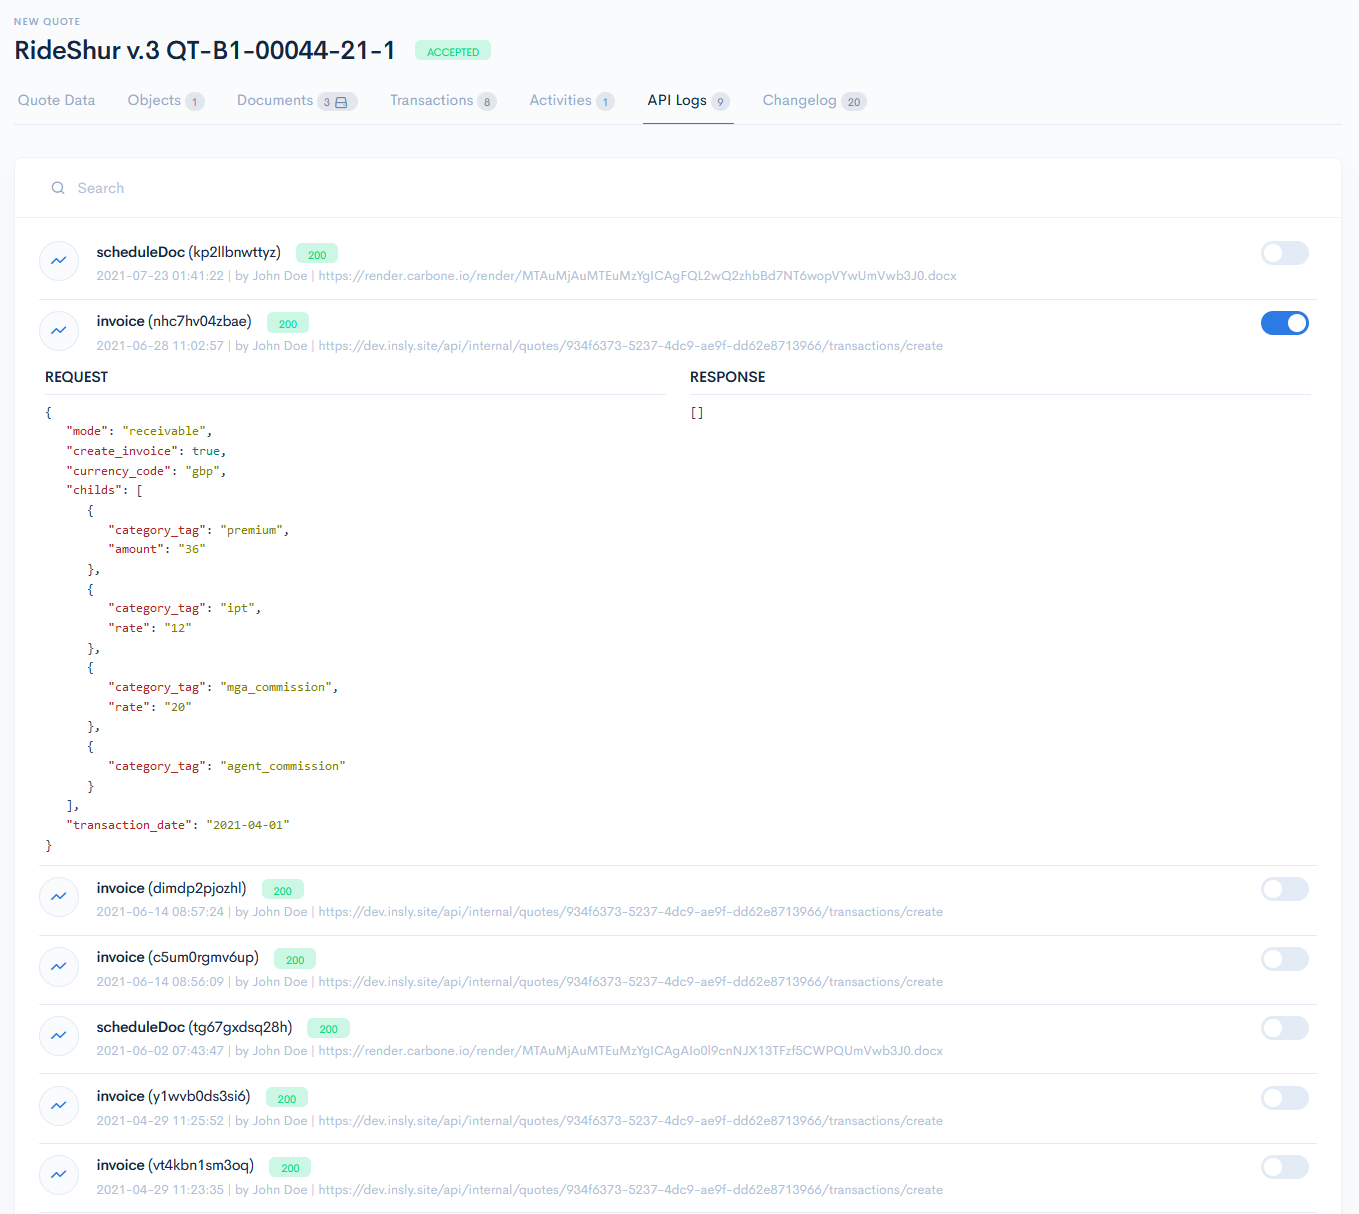
API Logs
This section is used to check what API's have been integrated into a particular quote.
The API list consists of various API's names and you can open the code by toggling the button on the right and see exactly what happened in each API. Also, a particular date and time of integration is defined.
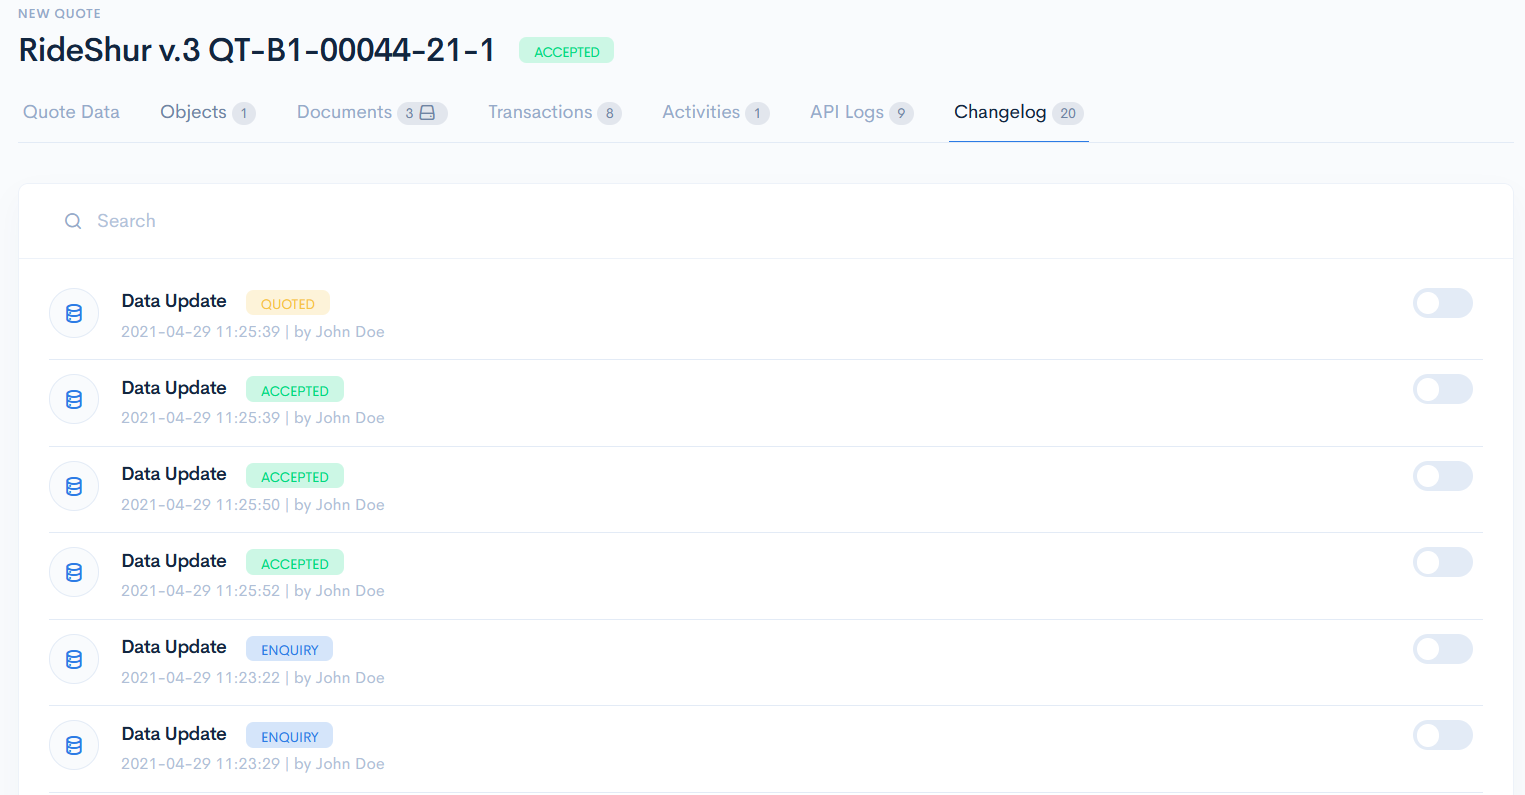
Changelog
Here you can track the changes of the quote. Next to each Data Update, there is a status of the quote at the change moment, and date/time. To see the .json code of changes, toggle the button on the right.