Overview
Payment plan is used when a customer pays for the policy in parts and it defines the payment schedule in the quotation stage. This will be applied for the policy on when being issued.
Payment Plans List
To access the payment plans, click Finances on the left sidebar and from the drop down menu select Payment Plans.
The payment plans list has the following columns:
| Tag | Unique identifier, which is used in schemas. |
| Name | Plan name. |
| Status | Plan status. Possible hardcoded options:
|

Create Payment Plan
To create a new plan, click the Create Payment Plan button. In the new window the following information should be filled:
| Name | Plan name. | Tag | Unique identifier, which is used in schemas. |
| Currency | From the drop-down list select currency for the plan. |
| Status | Plan status. Possible hardcoded options:
|
| Transaction Count | In how many parts the policy payment total amount will be divided. |
| Create Invoice | Define on which transaction an invoice will be created. An array should be entered. E.g.: [1,2] - an invoice will only be created for the first and second transactions. |
| Generate Invoice Document | Invoice document will be generated. This button has to be toggled to a true position by default. |
| Proportions | Define how the transactions will be split in percents. E.g.: If the transaction count is 4, then enter four numbers in the array: [60,20,20,20] - the first transaction will be 60% and other remaining 3 will be equal to 20%. If the field is empty, then the transactions are split proportionally. |
| Round on Transaction | On which transaction a rounding remainder will be applied. |
| Rounding Style | From the drop-down list select the style. Possible hardcoded options:
|
| Specific Month Day | Enter the month day (1-31), if you desire that all of the transactions will be dated to this one day. |
| Date Offset Days | An offset in days from the given date for the first and sequential transactions dates. Number can be positive (1) and negative (-1) |
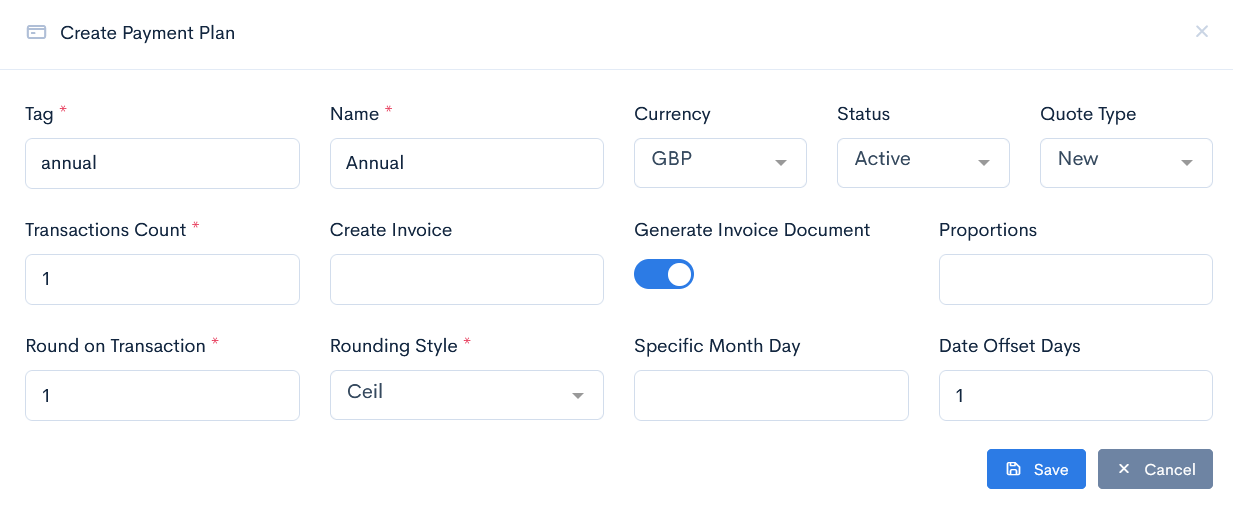
{info.fa-info-circle} Fields marked with a red asterisk (*) are mandatory.
Edit or Delete Payment Plan
To update or delete a plan, hover over the three dots on the right of the field and click Edit or Remove.
